Showing posts with label Holidays. Show all posts

Thursday, January 28, 2010

Sweet Love

Love is meant to be sweet and ideally also stylish. The Sweet Love Collection from Tom Kat Studio is the perfect sweet, stylish, and modern Valentines Day collection. Sweet Love is sweet enough to decorate  Valentines bags and treats for kids and modern enough for you. Tom Kat Studio has once again found a perfect balance between whimsical and modern. Package a sweet and stylish treat for your friends, neighbors, or your kids teachers.   The best part, Sweet Love is a downloadable file that you can print, cut, and use immediately. No waiting for anxiously for your package to arrive on time!


These adorable printables can be used for much more than Valentines day too. We love the idea of a sweet love baby or bridal shower! Showers are all about showering the guest of honor with love. Use the Red black and white color scheme to create a fabulous shower with red or black table cloths, red candies and treats, white serving platers. The ideas are countless, have fun with it.

Add Swanky Chicks NEW Black Baroque frames for a gorgeous pop of black. Use them as place card holders or fill them with pictures of the guest of honor.

Favor your guest with even more love with our Love glass coaster gift set. The set comes with four lovely glass coasters that measure 3.5" x 3.5" each and a thank you tag.

Friday, December 11, 2009

Mason Jar Cookie Favor

Swanky Chicks knows the importance of great favor for any party, and choosing the perfect favor can be a challenge. A favor thanks your guests for taking the time to celebrate with you, and share your joy. No Fuss Fabulous has a great DIY favor project that you can incorporate into your next event. Change out the fabric ribbon and label to coordinate with your theme and you have a favor that your guests can't wait to get home and use!
 

Mason Jar Cookie Favor.
You will need:
Pint sized mason jars
Fabric
Ribbon
Glue
Labels

Dry Ingredients to pack in pint mason jar:
3/4 cup and 1 tablespoon and 1 teaspoon all-purpose flour
1/4 teaspoon baking soda
1/4 cup white sugar
1/2 cup semisweet chocolate chips
1/2 cup Christmas M&Ms
1/4 cup packed brown sugar

Directions: Combine the flour and baking soda. Place flour and soda mixture in a clean pint sized glass jar, and pack firmly. *See NFF Tip below! Place sugar on top. Pack firmly. Layer with chocolate chips and M&Ms. Place the brown sugar on top, again packing firmly. Cover with a lid.


Attach an index card with the following directions: Empty contents of jar into a large bowl. In separate bowl combine 1/4 cup plus 2 Tablespoons of butter, 1 egg and 1/2 teaspoon vanilla. Beat until creamy. Add to dry mixture. Drop by tablespoonful onto an ungreased cookie sheet, and bake in a preheated 375 degrees for 6 to 10 minutes. (Cut the index card into a circle and attach to the inside of the lid or print directions on the backs of the tag.)


Tip: The best way I have found to keep the flour from getting all over your clean mason jar is to simply cut a large tip into a disposable decorating bag (a large plastic Ziploc would work as well), place the cut bag into your mason jar and use it as a funnel for your dry ingredients. This keeps the sides of your jar crystal clean and will give you the clear layered look you want.

Now to decorate your jars: Choose a fabric in colors that coordinate well with your theme. Cut the fabric into small squares and place over the tops of the jars. No Fuss Fabulous chose a Christmas theme and used great red and white stripped Martha Stewart napkins. Next choose a ribbon that also coordinates, be creative, it doesn't have to be matchy matchy. Cut a length of ribbon, wrap it around the lid of the jar and secure in place with glue. Use the same ribbon, or another widder ribbon and wrap the middle of the jar. You can now glue a card to the front of the jar. Use your monogram, event date, or sentiment like Happy Holidays on the card.

This favor can be given in so many ways. Make a few for your kids teachers, or your coworkers for the holidays. Nothing is sweeter than a baby, except maybe a sweet treat to send home with baby shower guests. I would love to be wedding guest who gets sent home with this thoughtful favor!

Special thanks to Chris from Celebrations at Home for turning us onto No Fuss Fabulous. We are loving all of the great ideas on this site. Special thanks to No Fuss Fabulous for the idea, pics, and recipe! She even has a link to download her cute labels totaly free! Go Here to download.

”Show Us Your Life with Kelly's Korner”
Swanky Chicks is participating in a Recipe swap with the DIY Show Off and Kelly's Korner. Stop by thier sites for more great holiday recipes!

Wednesday, December 9, 2009

DIY Wednesday- Monogrammed Holiday Ornament

We have a great DIY projet for you this week. It's begining to look a lot like Christmas around here! The Holiday season is in full swing, and Swanky Chicks has a great monogrammed ornament tutorial.


Brides with a winter wedding this little project makes a lovely favor for your guests. Make the ornaments to color coordinate with your theme and monogram them with the year, the date, your monogram or your guests! Monogrammed ornaments are a great personalized gift for friends, family, and newlyweds.

To create these one of a kind ornaments you will need
Clear Ornament balls
Letter Stickers
Ribbon to match your theme
Shredded Paper for gift baskets in your colors

This project is a snap. Remove the tops of the ornaments and fill theme with your colored paper. Put the top back on and tie a matching bow with your ribbon. Lastly place your monogrammed sticker on the front. That's it your done and you have a boutique worthy ornament!
Special thanks to Kelly's Korner for this project idea. Surf on over to check out her adorable tree!


Saturday, December 5, 2009

How to get a great family photo for your holiday cards- Guest Blog Spot

I was recently asked by the Mommies Cafe to be a guest blogger! It really made my day to find out that my post on how to get a great family photo for your holiday cards is being featured. Head on over to Mommies Cafe to read my guest blogging post and get tips on getting a great holiday photo. Don't forget to check out  our line of modern christmas cards at Swankychicks.com. Our sale has been extended and we are offering 10% off your entire order with the coupon code XMAS, making the holiday cards even more affordable!

Friday, December 4, 2009

Ladies Night Out Holiday Party

It's Friday and that means time for Kelly's Korner Blog Hop. This week we are sharing Christmas trees. Since mine isn't up yet I have decided to share with you some decorating ideas and a great new holiday company. Anyone living in and around the Tucson AZ area your "holiday helpers" are here! Wednesday Bella Luci hosted a ladies night out pre-holiday party. They shared great decorating tips, hosted a white elephant ornament exchange, and lots of good food and wine. The party was a way for the ladies to get together for wine and desserts before all of the holiday madness begins. If you are not a Tucson resident don't worry this post will be full of great decorating ideas for you to try yourself. If you are in Tucson check out the Bella Luci website and give them a call for an estimate. They will put up your lights and decorations, design a whole new christmas space for you, or help you host your holiday party.

Festive candles and snowflake theme place cards labeled the appetizers and desserts. Not only did they look great but you knew exactly what everyone of the yummy plates were!


Coffee was served after dinner in this beautiful silver service with gingerbread, and peppermint mix . I just love a reason to break out the good stuff.
Dinner was served on "real" plates but appetizers were buffet style on these great modern red, black and white paper plates

Even the powder room was decorated. We love the brown and copper and it matched so well with the bathroom. The tree was copper sequins and feathers!

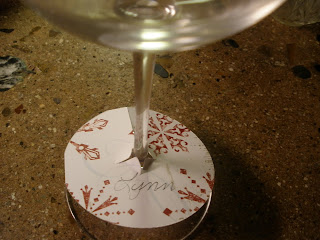
These great little wine labels were just a festive card stock placed around each glass so you could write your name on it and find it later.

Thursday, November 26, 2009

Harvest Color

Happy Thanksgiving! Swanky Chicks is so thankful for our followers and clients, you make it all worth it. We hope everyone has an amazing thanksgiving and that you are blessed with an abundance of things to be thankful for today.
One last thanksgiving post this time highlighting the wonderful use of harvest color from Country Living. This table is so gorgeous I want to recreate it in my own home.


"Jewel tones and saturated color heighten the appearance of the Thanksgiving table and celebrate the season's bright foliage against the late-autumn sky. To get the look here, take advantage of the enhanced color attributes of inexpensive faux foliage and rich textile remnants. Present the faux berries and leaves (combined with real leaves, if you like) in a free-form display of pitchers and teapots, sugar bowls and goblets. The burnished finish of the collection will unify the look of the table, and the display lets you enjoy objects you love but don't always have the opportunity to use. Soften the effect with simple white candles; just be sure to set their flames well clear of the berries and leaves." Stop by Country Living for more details. Don't forget on Friday we will be sharing our own Thanksgiving decor.

Tuesday, November 24, 2009

Oak Leaf Ornaments for Thanksgiving

Happy Tuesday, two more days until Thanksgiving and another great project to dress up your home. This one comes from Better Homes and Gardens. Make a bunch of these simple fall ornaments and hang from string across the mantle or dangle from the dining room light fixture.

Fallen Leaves Ornament
Decorate your home with simple ornaments made from fallen leaves. Cover a clear glass ball with fresh or silk leaves using a decoupage medium, then add sparkle with small beads.

What You Need:
Glass ball ornament
Artificial fall-color oak leaves
Scissors
Thick white crafts glue; glue brush
Clear mini glass marbles
Decoupage medium: Liquid Beadz
1/4-inch-wide ocher satin ribbon


How to Make It:
Remove the metal cap and hanger from the glass ornament and temporarily set them aside.
Brush glue onto the underside of an artificial oak leaf and wrap the leaf, glue side down, around the ball. Cup the newly attached leaf in your hand for a minute as the glue begins to set. Repeat the process with another leaf, overlapping portions while allowing the clear glass to remain visible. If necessary, apply more glue under the leaf tips so they lay flat against the glass; let dry overnight.
Pour about two tablespoons of clear glass mini marbles into the ornament. Replace the cap and hanger on the top of the ball.
Brush a coat of decoupage medium over the oak leaves; let dry. Embellish the leaves with decorative accents of Liquid Beadz, concentrating on the edges of the leaves, especially around the base of the hanger; let dry.

Thread an ocher ribbon through the hanger, and tie the ends together in a knot.

Monday, November 23, 2009

Family Nostalgia - Thanksgiving Inspiration


This gorgeous table is from Country Living. Before your Thanksgiving dinner collect old family photos, print them in black and white or sepia tone, and mount them to cardstock. Place them throughout your table and you will have a great way to decorate and share family memories. Your family is sure to tell stories all evening long that the photographs remind them of. This idea incorporates a bit of family nostalgia into your table setting full of style.

For place cards, use a pin to attach a weathered looking paper with everyones names handwritten. You want to achieve an aged look that compliments the colors of the  golden pear and photographs.
"This time of year, the table serves as both a place to gather and a symbol of gratitude. Here, four ways to personalize yours. "Come to the table." At Thanksgiving, more than at any other day or event, these are words that convey such warmth and anticipation. A year has passed since this holiday was last celebrated, and now, the table set with a feast that befits the harvest, the time has come to gather once again. This year, prepare a memorable table using everyday materials and your favorite things. "

The rich golden tones are perfect harvest colors. Try incorporating some fallen oak leaves, wheat, and branches. The muted tones and natural feel will work great with this look.

Tree of Thanks - Thanksgiving Centerpiece

In honor of Thanksgiving this week we will be bringing you a new Thanksgiving project everyday! We hope to inspire you and help you create a wonderful Thanksgiving table to share with your friends and family. Take elements from your favorite posts and incorporate them with what you already own to create a truly original tablescape. We would love to see what you come up with so don't forget to snap a few pictures to share. On Friday we will be doing a McLinky so that everyone can share thier beautiful creations!

Today's project, Tree of Thanks from Better Homes and Gardens. I love this one it truly embraces the reason for the holiday.


Turn a potted tree branch into a sharing tree. Ask family and friends to write messages of thanks to hang on the tree. Chickpeas (attached to the branches with glue) masquerade as berries, while paint and glitter add a festive touch.

What You Need:
Tree branch
Handheld hedge clippers
Butter tub
Cement
Water
Disposable container
Hot-glue gun and glue sticks
Chickpeas or dried beans
Spray primer
Orange spray paint
Clear spray sealer
Orange glitter
Scissors
Decorative container
Decorative rocks and silk leaves
Papers in green and gold
Paper trimmer
Glue
Marking pen

Shower curtain clips

How to Make It:
Trim a dry dead branch to the desired size and shape using hedge clippers. If needed, combine several small branches.
Choose a container, such as a butter tub, that can be hidden in a decorative container and filled with cement.
Following the instructions on the cement package, mix cement in a separate disposable container. Pour the cement into the butter tub.
Insert the branch base into the center of the cement-filled tub. Tap the sides of the tub until the branch sits firmly in cement. Allow cement to dry.
Use a hot-glue gun to adhere chickpeas or dried beans randomly to the branch, using as many as desired. In an outdoor area, spray the branch with primer. Spread extra chickpeas on newspaper and spray them with primer. Let the primer dry.
Spray-paint the branch and chickpeas with orange; let dry.
Spray one section at a time with clear sealer. Quickly sprinkle orange glitter onto wet sealer; let dry. Repeat this process until entire branch and chickpeas are glittered. Place the weighted tree into decorative container. Place decorative rocks around the branch base until the cement is covered. Sprinkle extra chickpeas onto the rocks.
Trim silk leaves from stems. Coil the wired ends and hang on the tree.
Trim 2-inch squares of green paper and 13D4-inch squares of gold paper. Center and glue the gold paper onto the green paper. Ask family members to use a marking pen to write meaningful messages on the squares. Use shower curtain clips to hang the messages from the branches.
Leave extra colored squares around the tree base for guests to add more messages to the tree.

Wednesday, November 11, 2009

DIY Wednesday- Thanksgiving

Hi I almost forgot it was DIY Wednesday! Well thanks to Chris over at Celebrations at Home problem solved! "Paper and Cake is generously offering us a FREE Thanksgiving printable collection! Make your tabletop special with steps as easy as click, print, & cut." Thanks again Chris and Paper and Cake this is the perfect DIY Wednesday for the Swanky Chicks and just in time for the holidays.
Wow what a freebie it is, the downloadable file includes menus, place cards, invitations, wine glass tags, napkin rings, vase/candle wraps, recipe cards, food labels and so much more. You must stop by and thank Chris for this awesome lead and give Paper and Cake some love for creating this gorgeous suite for FREE!

Holiday Photo Cards are Here!!!


Our 2009 Holiday Photo Cards are now available and they are gorgeous. Fast too, all the cards will ship with in three days of final proof approval! We have teamed up again this year with Take Note! Designs to offer you a modern take on the traditional holiday greeting card. We are excited about the line, and feel it is a good reflection of traditional and fashion forward color palettes, as well as calm and restful, with a mix of traditional, vintage, fun to beautiful.
Here are a few of this years favorites.


What are you waiting for hurry on over the Swanky Chicks and get your today!


For every holiday card order Take Note! Cards gives 25% of sales to breast cancer research, all holiday, all sales, just all of our way of spreading holiday cheer to those who need it most!


Monday, October 26, 2009

UPDATED: Kelly's Korner Show Us Your Life- Fall Decorating


We are participating in Kelly's Korner Show us your life this week. I am a huge fan of Halloween so I am so excited to show you what we have been up to decorating the house. I need to run around and take some pics of what I have done this year. In the meantime I will post my inspirations and come back later today and show you what I created from these inspiring projects!

My first new project for this year was these adorable pumpkin topiaries I spotted on the Party Dress. They are from Good Housekeeping and there is a great little tutorial on how to make them. I tried my hand at making one and I will post the results this afternoon. Follow the Swanky Chicks Blog and you will get an update when I post them!
I also recreated this super simple but spooky door wreath and it cost me less than $10! You cannot beat that.


Earlier this year (way back in July) I did a post on the lovely Halloween decorations that Martha Stewart has created for Grandin Road. Well I have been holding out for the after Halloween sales to get them on sale. I am a big time bargain shopper, I try and buy as much as I can on sale ;)
I was running errands in Walmart last night when I came across a glittery candelabra version of these awesome chandeliers, (read: I still must have the chandeliers but the candelabra will help me wait) and it was only $4! I swear it is really cute and not cheap looking at all even though it is cardboard and glitter.

Last week I posted this awesome spooky tablescape from Gypsy's corner. Her skulls and bones all covered in glitter inspired me to make up a few of my own. I got all the supplies at Michaels and got to work. The little styrofoam skulls were $1.50, a jar of modgpog I already had and a tube of glitter (the really small pieces) Check back this afternoon for pics of the results. I started with one the see how it would turn out and I love it so much I am going to make more!

These things have not found a home yet :) They are all on my table waiting to be dispersed throughout the house. But I am proud of my little glitter skull inspired by gypsy's corner!


And a few more pics of some of the other decorations ENJOY!


Monday, October 19, 2009

Fall Table Inspirations

Some fall inspiration for you today from some of my favorite sites, Southern Living, Better Homes and Gardens and Good Housekeeping. These beautiful fall table setting ideas are ones that you can actually do yourself! It's perfect for a fall wedding, couples shower, or your thanksgiving table. Simple touches from nature like leaves, acorns and gourds add beautiful touches of fall color. Most of the items can be collected in your back yard or a walk in the park, add a few candles and some gourds from the store. I created this awesome inspiration board on Style Me Pretty's new Style Circle, it is full of great inspiration for brides, take a peak and prepared to be amazed by the creativity of the many brides to be.


Thursday, October 15, 2009

Halloween Tablescape

I have a confession along with fabulous parties the Swanky Chicks love love fabulous rooms. So I am often distracted and find myself browsing sites like HGTV's Rate my space. Imagine my surprise to find a perfectly spooky halloween table setting on rate myspace. The lovely home owner also runs a fabulous blog The Gypsy's Corner and is a blogher blogger. Tam loves to blog about decorating and has tons of cute DIY projects. She is quite the crafty lady. Her Halloween Tablescape has inspired me to revisit my own, I might just have to get out the glitter and glue! Check out her delightfully spooky halloween table at Gypsy's Corner.

The witch vignette on her side board is as equally creative as the table. She dressed up a plain skull with a witches hat and feathers.

I love the crow perched on the edge of the center piece!


How Tam achieved the look:
"In addition to my Halloween vignettes in the dining room I also set the table. The chargers are basic silver trays. The dinner plates I found at TJ Maxx the salad plates are from The Christmastree Shoppe. The center piece is an old 3 tier tray the silver witch hat on top came from Joanns the other two tiers hold bones and skulls I glittered orange and black round christmas ornaments orange acorns black crows and some orange glittered fruit. "
Related Posts with Thumbnails